
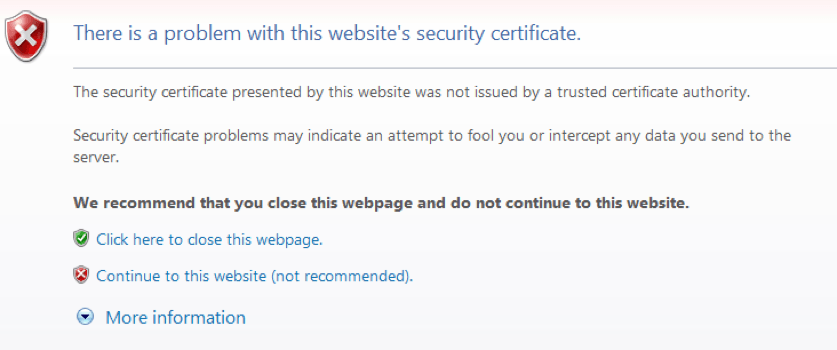
Everyone who has attempted to load a CUCM or CUC web page has seen that scary looking warning saying, “There is a problem with this website’s security certificate.”
Ahead Thar Be Dragons
On the page displaying the warning, the user is presented with the choice to “Click here to close this web page,” which it seems is the safest route, or to “Continue to this website (not recommended),” which is obviously an option that is foolish and reckless. Think James Dean drag-racing at 80 mph toward the cliff and Sal Mineo holding his breath to see who jumps out of the car first.
Most people who have worked with CUCM for any length of time don’t let the warning deter them. They charge ahead with a live-fast-die-young attitude, and if their sleeve gets caught in the door handle as they’re trying to open the sedan and they plunge to their death, oh well.
But after a while it can be kind of a pain to constantly have to click through the extra screen, so many administrators add the web certificate to the trusted store on their computer. This method works for many folks.
However, I recently became engaged by a client that wanted to have users employ the ccmuser and ciscopca web applications to manage their phones and voicemail accounts. The client is a government organization that is (naturally) very concerned about security, and their users have been instructed to never go to sites that flash warnings like the one above. They certainly are not allowed to add certificates to their trusted stores.
The way around this is, of course, to add a trusted certificate to CUCM and CUC that the Tomcat service can use when starting up the website. By “trusted” I mean that the certificate will already be in the store of the computers in question. This usually means that the certificate will be one that’s generated by a certificate authority (CA) server on the premises, or it means that a certificate will be purchased from some third party CA (like VeriSign or Go Daddy).
What we did was get the CA at the organization to generate a certificate for us.
The process of getting a new Tomcat certificate for the devices begins with generating a Certificate Signing Request (CSR) that can be given to the CA to ask for a certificate. This is done the same way in both CUCM and CUC.
One thing worth mentioning at this point is the fact that we’ve heard that there are more and more internal CAs that are using fraud protection. The protection frequently requires that the Cisco server administrator give the FQDN of their server to the person running the CA, and receive from the CA a number. The CSR has to be constructed to use the number instead of the FQDN of a server. When the CA processes the CSR, it takes the number mentioned therein, matches it to the name in the CA database, and generates a certificate with the correct FQDN. Beginning with CUCM v.9.x it’s possible to manipulate the information contained in the CSR, but not with versions before that. If you’re using CUCM v.8.x or below and your CA requires you to change your CSR, you’re going to have to find a new CA.
Assuming, however, that you’re using v.9.x or above (and I am), you’ll be able to do the required manipulation. You’ll also be able to do multi-server certificates which allow you to get a single certificate for your entire cluster (including the IM&P servers), upload it to your Publisher, and have it replicate to all of your servers. This is the method I’m going to describe.
To generate a CSR, follow these steps:
- Go to the OS Administration page on your Publisher and navigate to Security > Certificate Management.
- Click the “Generate CSR” button. In the new window, make sure the “Certificate Name” is “tomcat”; that the Distribution is “Multi-server(SAN)”; that the common name is what your CA requires (maybe the FQDN of your Publisher followed by a “-ms”, maybe the FQDN without the -ms, or maybe some sort of numeric identifier provided by the CA — see above); that the Subject Alternate Names are the FQDNs of your servers (including the Publisher); and that the Parent Domain is whatever your domain name is. Note that some CAs don’t want the parent domain field populated at all, so ask. It is possible to erase what’s in that field. Make sure that the key length and hash algorithm are correct (the default is usually correct) and click the Generate button.
- When the pop-up window goes away, a new button will appear on the main screen that says “Download CSR.” Click this button. In the new window make sure the certificate name is still “tomcat” and save the certificate to your favorite spot. When you save the CSR, it’s a good idea to give it a name so you can identify which server generated the request. It doesn’t really matter what name you give it. The information inside the request is what counts from the CA’s point of view, although – again – the CA may have its own ideas as to what it would LIKE the name to be. Remember to ask.
- It’s not a bad idea to check the CSR and discover the names of the servers it contains. Cisco products are case-sensitive when it comes to the names of servers in certificates and if you have to provide those names to the CA before you provide your CSR to them, you’ll want to make sure you’re giving them the correct information. To do this, you can open the certificate request using something like notepad, then copy and paste the information it contains into the SSLShopper website. The site will spit out the actual contents of the request so you’ll know what you’re really asking for.
- Send your request to the CA.
When the certificate is received back from the CA, it may have one of several possible extensions. It might even just be a text file that you have to copy and paste into notepad and save yourself. Interestingly, you can change the extension of the certificate to allow yourself to do different things with it. For instance, if you change the extension to “.pem” you can open the certificate using something like notepad and verify that the certificate really matches the CSR. To do this go back to SSLShopper, but this time use this link. Under “What to check,” select “Check if a CSR and Certificate Match,” copy the information from the certificate into the first field and then copy the request into the second field. After a short time it will show you if what’s requested is really what you got.
If, on the other hand, you change the extension to “.cer” you’ll be able to open it with Crypto Shell Extensions (which seems to be built into Windows 7+). Click the Details tab and it’s possible to see the date that the certificate is “Valid to.” And yes, if the time runs out the certificate will suddenly stop working, so keep a list of certificate expiration dates and make sure you put them on your calendar.
When you look at the certificate with a .cer extension, you can also check the serial number of the certificate, which might come in handy if you feel that a certificate of some kind on your server is wrong; like maybe it’s an old version that didn’t really get replaced in a replication when you put your shiny new certificates on the Publisher (been there).
Also, click the Certification Path tab and it will be possible to see the certificate chain involved in the generation of this bad-boy. There’s always going to be a root certificate. It’s often the case that there will be one or more intermediary certificates too. If there are several certificates listed in the path, it will be necessary to get all of them from the CA before beginning the process of loading anything onto the Cisco servers. You have to install the certificates in the order in which they are listed in the Certification Path beginning with the root and moving down the chain to the certificate generated from the CSR.
When you’ve gathered your certificates together it will be time to upload them. Go to the OS Administration page on the Publisher and navigate to Security > Certificate Management. Click the button to “Upload Certificate/Certificate Chain.” Search for the root certificate supplied by the CA and upload it as a “tomcat-trust.”
If there are any intermediary certificates, upload them as “tomcat-trust” certificates in the same order as they were displayed in the Certification Path tab on the certificate itself.
When this is done it’s a good idea to check a sampling of your cluster’s Subscribers to make sure that the root and intermediary certificates replicated like they’re supposed to.
Finally, upload the certificate generated from the CSR. I usually do it with the certificate carrying a “.pem” extension, but a “.cer” works too. It all winds up performing the same function. When you upload this multi-server certificate, though, make sure you do it as a “tomcat” certificate.
Note what I just said there. The other certificates are “tomcat-trust,” but this one is “tomcat” only.
Once the certificates are uploaded, restart the Cisco Tomcat service on each server. That’s each server. In the CLI, type “utils service restart Cisco Tomcat.” Remember, too, that when you issue this statement it usually takes a minute or so for the service to restart, but it takes about 10 minutes for the service to want to begin displaying the web page again, so make sure you do this during a maintenance window.
That should do it for the Tomcat piece. When your administrative or user pages are displayed they should now no longer show the scary message about the website being unsecure. You should also see a friendly looking lock in the address bar of the web page.